

Building a Simpler Minecraft Server Host
Minecraft is my favorite game, and I love setting up servers, but it takes a good amount of time. Minecraft server hosting often felt overly complex, requiring technical know-how and a bunch of setup steps that shouldn’t be necessary to play with friends. My motivation for Hermes was simple: make Minecraft server hosting as easy as clicking a few buttons.
I envisioned a web application anyone could use, with simple menus and easy layouts, to launch and manage their own Minecraft servers. This meant focusing on user experience and automating away the server administration headaches.
Naturally, because this was going to be a very server-heavy project, I chose Docker 1 as the foundation.

Docker
Docker containers are the perfect solution for isolating and managing individual Minecraft servers. Learning to programmatically orchestrate these containers within my web app was a significant challenge, but I learned so much about Docker and its ecosystem that I’m incredibly proud of the work I did. I leveraged the docker-compose 2 npm package in my SvelteKit 3 backend to manage the server lifecycle from creation to shutdown.
Initially, I was using NodeJS and the child_process module to communicate with Docker Compose, but I ran into issues with the Docker daemon being unable to communicate with the container. I switched to using the docker-compose npm package, and it worked (nearly) flawlessly. There were still some hiccups with sending RCON commands, but I got there in the end. Another big help during this project was the package neverthrow 4 , which made error handling and error management a breeze. Before using neverthrow, I tried using try/catch for error handling, but it was a pain to manage, and I didn’t like the idea of having to write a try/catch’ block for every function call. Instead, each function returns a Result object, which is either an Ok or an Err object. This allowed me to handle errors in a more structured and readable way.
Finally, the last piece of the puzzle was SvelteKit. Its full-stack nature allowed me to seamlessly integrate the web interface with the server-side Docker management logic.
Effortless Server Management
The part that I’m most proud of is the simplified server creation process. Forget config files! Users are guided through a web form - like this:
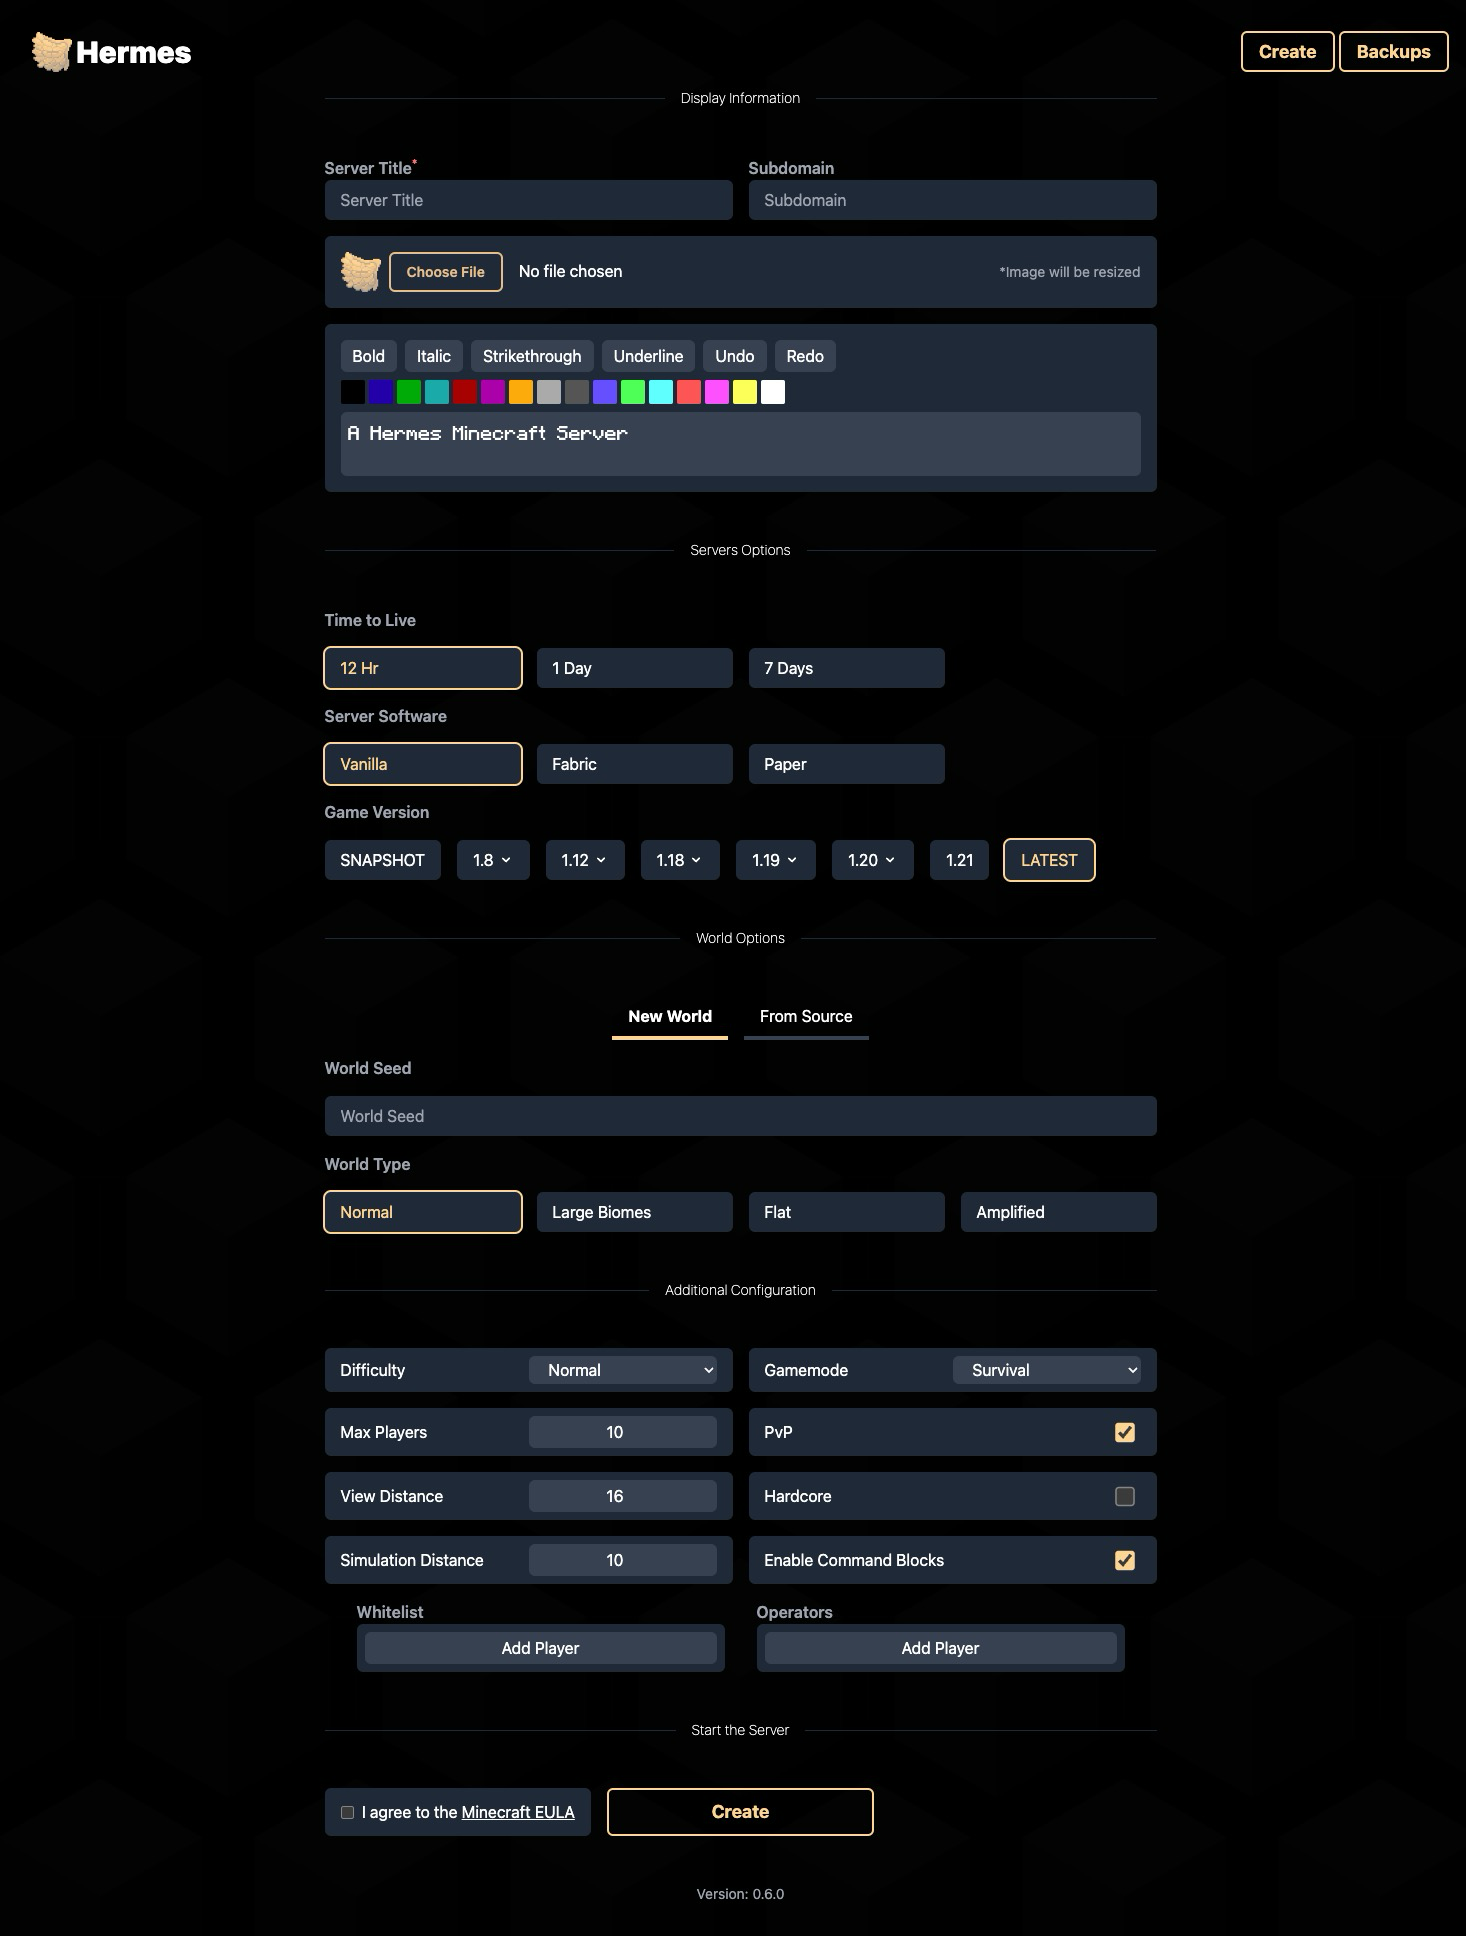
…where they can select the Minecraft version, choose maps, and customize settings, all through a user-friendly interface. Hermes then handles the backend complexity, spinning up a new Docker container configured to their specifications.
But then, how do you connect to the server? Well, Hermes uses the Cloudflare 5 API to dynamically create DNS records. This means instant server accessibility with minimal user intervention. This way, all the necessary CNAME and SRV records are created for you, and you can access your server with a single domain name. The CNAME records tell HTTP clients which IP address to connect to, while the SRV records tell Minecraft clients which port to use.
That brings up another part of the automated setup. Because all the servers are hosted on the same machine, each gets its own port. In the Hermes configuration, you can specify the port range the servers will use. Then it will automatically assign a port from that range to each server, ensuring no conflicts. It will even prevent new servers from being created if no ports are available in the range.
Configuration
To ensure that Hermes works well for anyone using it, there are many configuration options to customize the appearance and other important server settings.
# The port range (inclusive) that the server will use for the public servers.
# This should be changed based on how many servers you want to allow
# and how many ports you have open on your server.
- PORT_MIN=25563
- PORT_MAX=25564

# Whether to avoid the default Minecraft port 25565.
# This can help with preventing the servers from getting scrapped and
# being targeted for griefing.
- AVOID_DEFAULT_PORT=true

# This is the default icon for the servers and can be changed to any URL.
# A default icon is included with the container; feel free to change it.
- PUBLIC_DEFAULT_ICON_URL=https://example.com/icon.png

# This allows you to set the default MOTD when creating a server
# This will be used if a custom one isn't entered
# Do not put color codes here, they won't work
- PUBLIC_DEFAULT_MOTD=A Hermes Minecraft Server

# This variable allows you to control how long you want to keep stopped servers
# before they are deleted. This is in hours, and the default is 168 hours (1 week).
# If you don't want to delete servers, set this to -1.
- PUBLIC_TIME_UNTIL_DELETION_AFTER_SHUTDOWN=168 # In hours

# This option allows you to require all created servers to start with a whitelist enabled.
# This will make people enter at least one username when creating the server.
- PUBLIC_REQUIRE_WHITELIST=true
These configuration options (and more) are all documented on the Hermes Github 6 page.
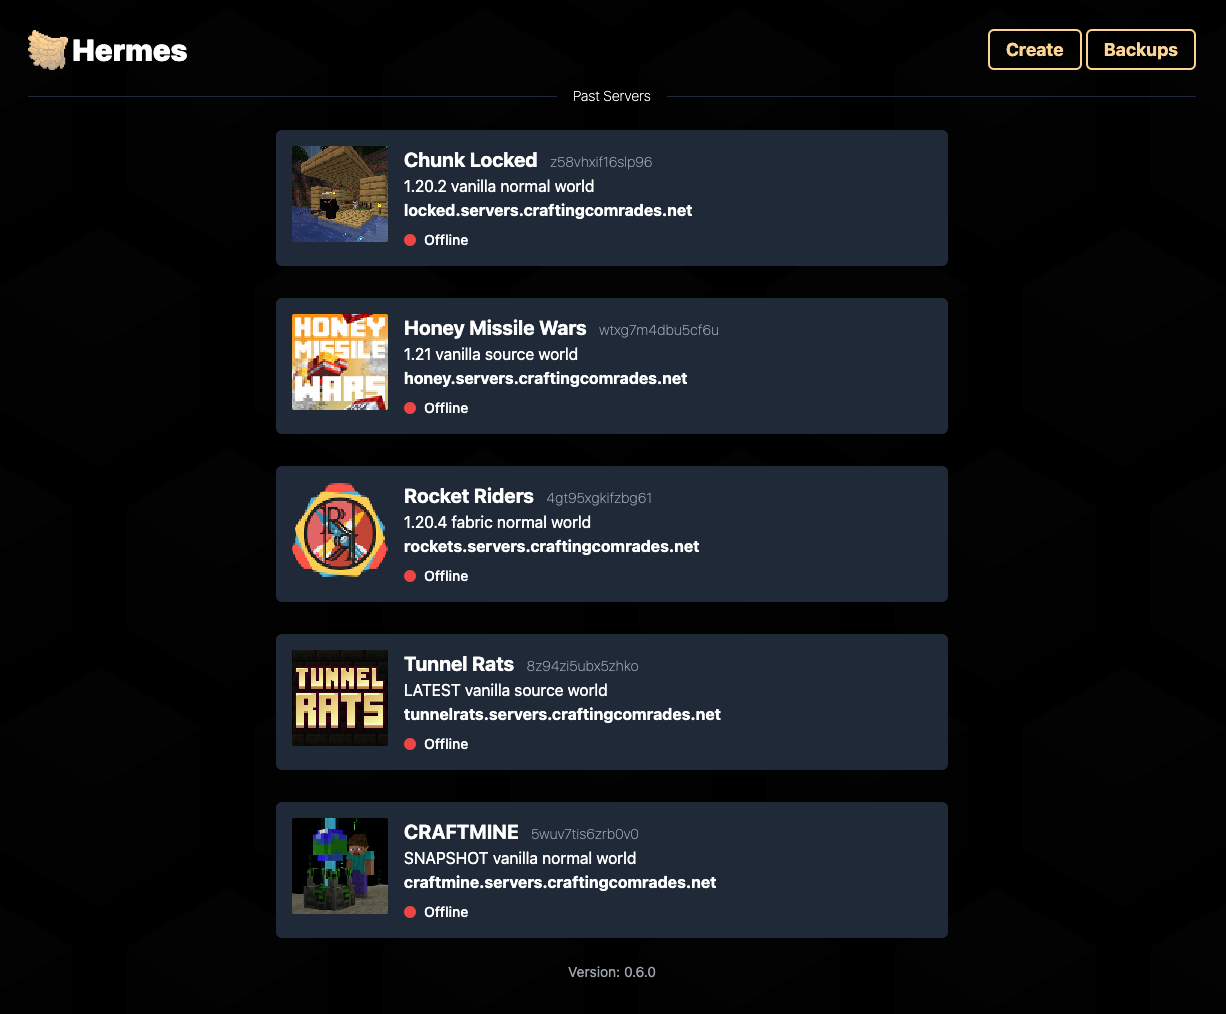
User Interface: Clean and Intuitive
The user interface was designed for clarity and ease of use. Here’s a glimpse of the server dashboard:

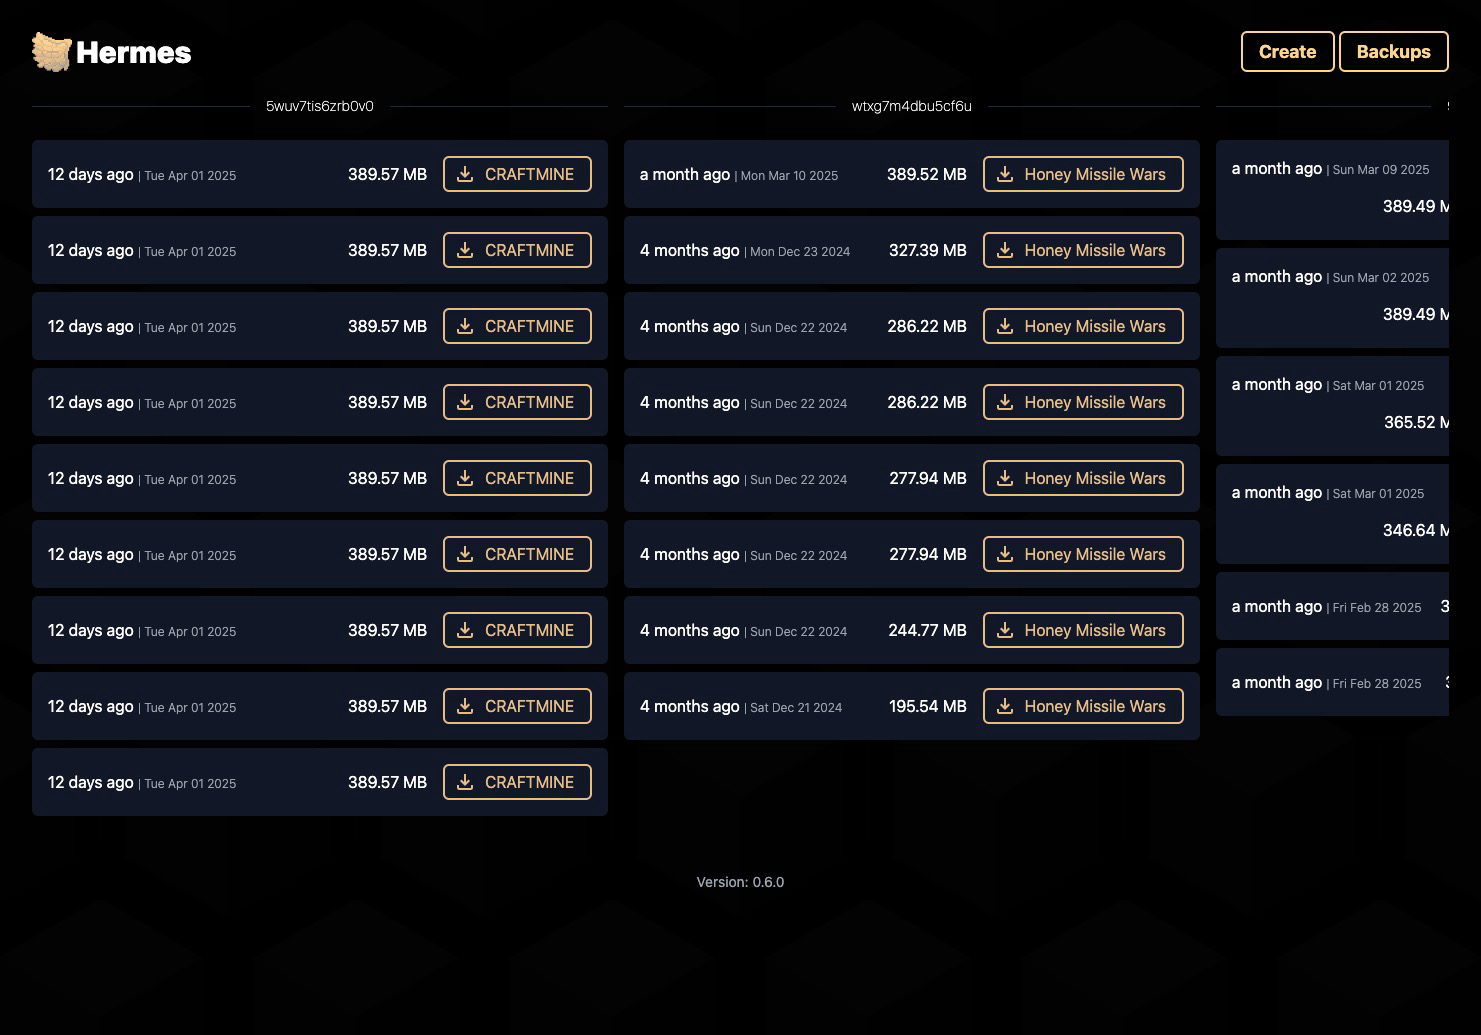
The dashboard provides a clear overview of all servers, while individual server pages offer real-time logs (kinda… it updates every 5 seconds), a command console, server controls, and the server’s CPU and RAM usage. There is also a backup management page that lets you download the server’s backups. The server is automatically backed up every time it is stopped.
Challenges and Learnings
Developing Hermes presented several major technical hurdles.
The largest one was orchestrating Docker containers programmatically. This required robust error handling and careful state management, which needed to be synced with the database. This was tricky because the Docker container’s actual state is not always the same as the database’s, since the container runs in the background. To combat this, the server manager runs a periodic check to see 1) the Docker container’s real state and 2) the Minecraft server’s lock file. If the real state doesn’t match the database, then the proper functions are called to either start or stop the server and update the database.
The second major challenge was implementing comprehensive form validation with Zod 7 . This was important for validating the user inputs on the creation page. In order to make sure the Minecraft server Docker container receives the correct configuration values. I need to verify that the user input matches expectations. For example, you can create a world from a seed or upload it from a ZIP file. Creating a new world from a seed gives you more world creation options, like the world type and superflat layers. However, with the file upload, you don’t get those options, so I needed to validate that the user wasn’t submitting extra information, which could cause a problem.
Key Contributions
- Developed a web application simplifying Minecraft server setup and management, targeting non-technical users.
- Implemented automated Docker container orchestration for scalable and reliable server hosting.
- Integrated Cloudflare API for seamless DNS configuration, enhancing user accessibility.
- Designed an intuitive web interface for comprehensive server monitoring and control.